Monday, May 4, 2020
Sunday, April 5, 2020
OP ART

Op Art Part 1
When something plays tricks on your eyes it is called an Optical Illusion. Op Art is artwork that plays tricks on our eyes.
Op Art was an art movement which began in the 1960s. It was a time when artists were very interested in the idea of creating movement on a two dimensional surface by tricking the eye with a series of optical illusions.
“Op” for “Optical Illusion”
“The birth of Op Art began officially with an article in Time Magazine. In 1964, Time Magazine published an article featuring an art movement involving optical illusions. Since the artists focused on eye manipulation, Time Magazine coined this new movement “Op Art”.”~Source Modern Masterworks
Artist M.C. Escher is famous for having created lots of different kinds of Op Art.

Bridget Riley is famous for creating Op Art that looks like it is moving. Sometimes it hurts your eyes to look at it for too long.

What to do:
Find out more about Op Art! Google some of the artists below and click on the images button to see more pictures by them. Save pictures of your two favorite optical illusions. Post them to our Teams class chat for everyone to see and tell us why you think they are so cool! Please post by Wednesday night.
Important Artists:
- Riley, Bridget
- Stella, Frank
- Albers, Josef
- Poons, Lawrence
- Noland, Kenneth
- Vasarely, Victor
- Anuszkiewicz, Richard
Op Art Part 2
What You Need:
- white paper
- Pencil
- Something to shade or colour your picture with - crayon, markers, pencil crayons, pen, pencils etc.
What To Do:
Start by drawing a gently curved line across the paper. Think rolling hill… not roller coaster!

Add 9 dots across the line.
They should be different lengths apart.
You need a dot close to the edges of your paper.

Start connecting the dots with bumps.
The lines from the dots close to the edge will go off the edge of the paper to an imaginary dot.

The lines will eventually go off the top and bottom of the paper .

Fill the whole paper.

Pick a group of colors you feel work well together (2 or 3).
Using pencils or colours, fill in the spaces. Press harder in the corners. As you get near the top of each bump, press lighter and lighter.

Continue until the work is complete and then share a picture to our Teams chat by Friday!


Examples used with the permission of Mrs. Brown of Mrs. Brown’s Art.
Tuesday, October 1, 2019
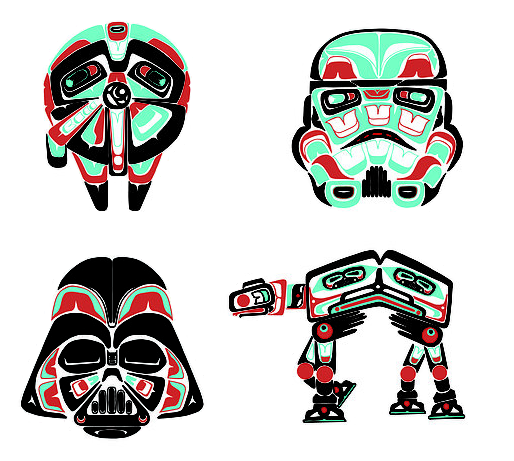
Pacific Northwest Coast Design Project


We will be creating a Lino Cut print utilizing the forms seen in Pacific Northwest Coastal art. This will draw together many of the themes and artistic concepts that we have studied across this semester - abstraction, symbolism, contrast, positive/negative space, contour/outline, colour, repetition, and the synthesis of examples/influences/inspirations into original forms.


You have been given a great reading package describing the traditions and cultures of this region as well as a plethora of design related information. Read this.
 Using our questioning hierarchy that we have been practicing across this semester create 3 questions based on the readings to submit to Mr.Craig. This may be submitted physically or digitally by emailing to nccart@gmail.com.
 Complete the animal abstraction exercise using one of the photographs provided in class as the basis. Compare with your peers. Consider what parts are most successful in each of your works.
Choose an image/design to use as the basis for your explorations of this style. Subject is open and designs may be traditionally based or totally radical (meaning you can make pretty much whatever you want - have fun in your explorations!!!!).
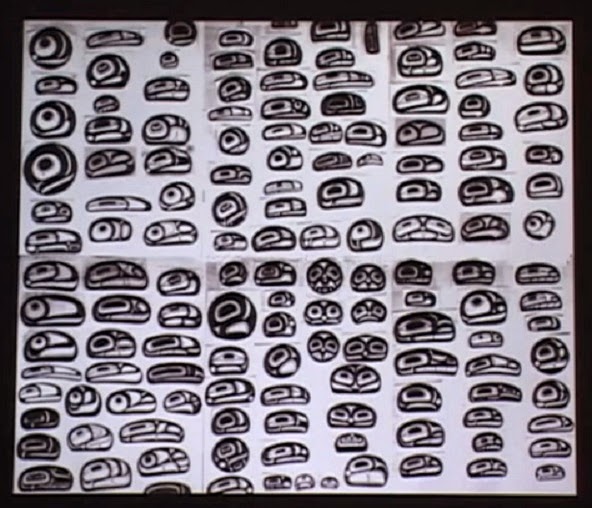
Ensure that you really focus on Formline, Ovoids, "S" Shapes, "U" shapes/Crescents, and Trigons - these are the formal components of this style and need to be well represented in your design. Bottom line this is going to call upon you to really THINK and PLAN your designs (*GASP*). I wish you the best of luck and recommend a great deal of trial and error working through your plan and reworking/editing it until you are genuinely satisfied!
Use the process and references found in your reading package to help you work through your design - and use the internet and class books to inform your decisions.
Here are some videos to help you work through designs and forms:
http://youtu.be/IS6UeBsZ6W0?list=PL7wkHlpOVM5uYuIEUUkGdqU1CKCpTn-NG
http://youtu.be/w_--smX0wy0?list=PL7wkHlpOVM5uYuIEUUkGdqU1CKCpTn-NG
There are also several short videos of internationally renowned artist David Boxley teaching Formline and design concepts - here are a few:
http://youtu.be/vntooi-awFs http://youtu.be/366v2EQEyMg http://youtu.be/tmytSw3QZEs
This one is a little long (70 minutes) but SUPER good! I HIGHLY recommend taking the time to watch it.
Formline: An Evolving Art by Bill Holm - http://youtu.be/lQZPNbDRg_w

REMINDER: YOU MUST GIVE BACK YOUR READING PACKAGE
AT THE END OF THIS UNIT!!!!!
Monday, February 26, 2018


Thursday, January 11, 2018
Photo Realistic Artists
Diego Fazio
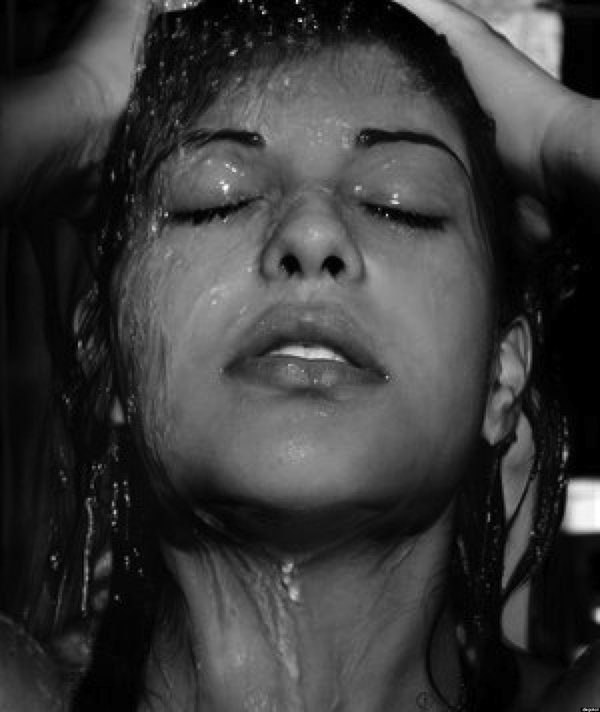
Artist Diego Fazio (also known online as DiegoKoi) can do some incredible things with a pencil. His hyperrealistic portraits are so lifelike they are often confused with black and white photographs.
Born in 1989 in Lamezia, Italy, this emerging talent is self-taught. He only began drawing in 2007 but has already won numerous awards.
Joongwon Charles Jeong
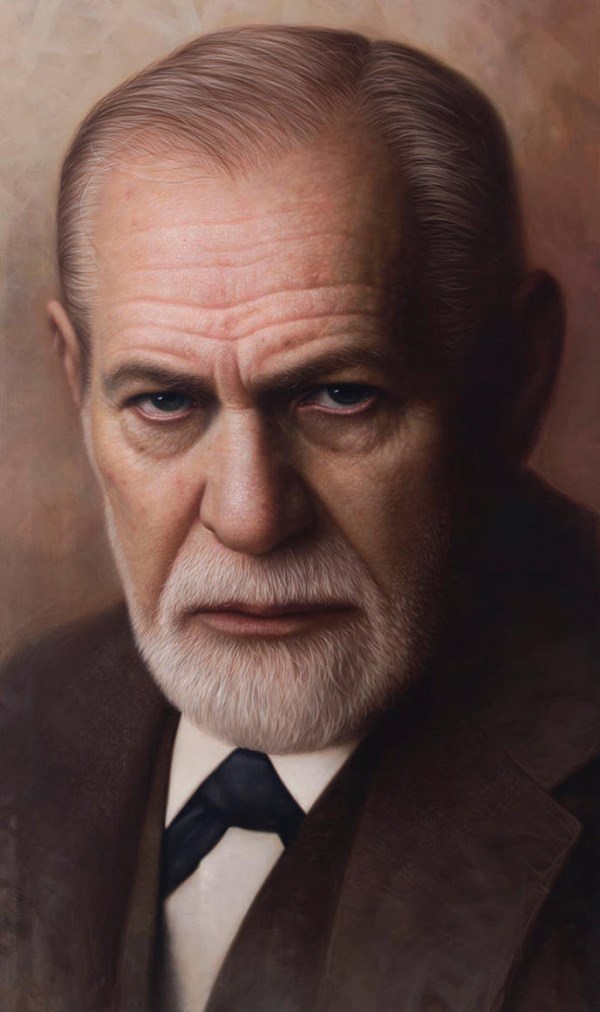
Joongwon Charles Jeong's paintings are so intricate many people mistake them for photos. He paints with such delicate brush strokes he can detail every pore of his subjects.
The artist, who hails from South Korea and studied Visual Communication Design at the Hongik University of Fine Art & Design in Seoul, also teaches keen young artists some of the tricks of his trade.
Gottfried Helnwein
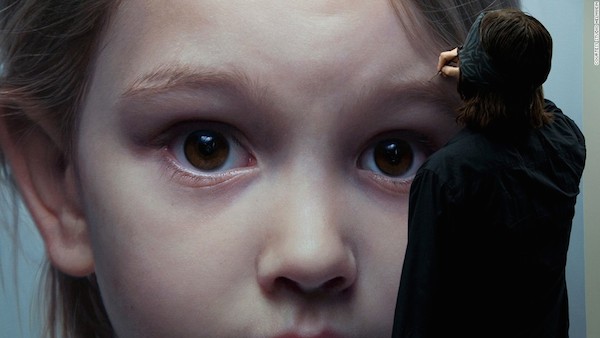
Gottfried Helnwein is an Austrian-Irish visual artist who has worked as a painter, draftsman, photographer, muralist, sculptor, and installation and performance artist, using a wide variety of techniques and media.
Helnwein is concerned primarily with psychological and sociological anxiety, historical issues and political topics. As a result of this, his work is often considered provocative and controversial. His paintings walk the line between upsetting and beautiful but are always provocative. While his subject matter isn't for everyone (it usually revolves around violence and children), his skills with a brush are undeniable.
Robin Eley
When you find out that the works of Robin Eley are oil paintings and not photos, you immediately go back to have another look. As hard as it is to paint people in such a realistic manner, Robin also “wraps” his models into plastic, which makes his art all the more impressive.
Eley spends around five weeks on a painting, working around 90 hours a week. He tries to explore the perception of isolation in the modern world, and the plastic wrap in his pictures works as a medium for this, since “it is something you can see through, but not feel through."
Kyle Lambert
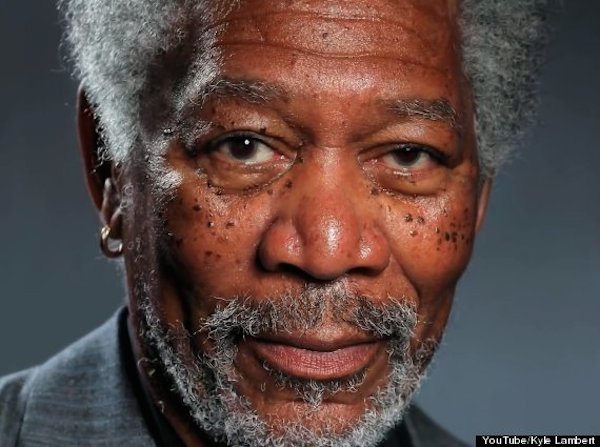
This hyperrealistic image was created with an iPad! That's right—it's a finger painting. Artist Kyle Lambert said that it took him a month to create his stunning portrait of actor Morgan Freeman. He used the iPad app Procreate to put together his masterpiece. The British-born artist spent over 200 hours and made over 285,000 brushstrokes, a process that he documented in a transfixing time lapse video.
Dru Blair

She could not look lovelier. However, the above image of a model named Tica is not a photograph, but a painting.
The incredible likeness was created by US-based airbrush artist Dru Blair and took more than 70 hours of painstaking work using ultra-thin lines of paint. He uses mini spray guns to deposit fine lines of paint on a board to produce the lifelike pictures—right down to skin pores.
Tuesday, June 13, 2017
Post Apocalypse Character Design Sheet

Character Design Sheet
– Please submit by email to nccart@gmail.com or place in the Culminating Project Dropbox
– Please submit by email to nccart@gmail.com or place in the Culminating Project Dropbox
1. 1. Describe the setting into which this character
fits. Include at least 10 images from your Visual reference file. 2 of the 10
images must be photos of your own transportation/habitation project and your landscape (or alternate where discussed) portions
of the project. Any other projects or designs you have that relate may be
included in this image file as well.
2. 2. Who is your character? What is their story? Are
they representative of the world in general or are they a particular exception?
Explain.
3. 3. What are the defining visual Characteristics of
the Character – how do they support/connect to the above story?
4. 4. What equipment/costuming/additional details help
to reinforce your context/characterization?
Tuesday, June 6, 2017
Step by Step Digital Art (step 6 THE FINAL STEP!)

At this stage, I added detail to his fur coat, and shirt, and also using a spray tool to give the illusion of snow. I focused most of the snow build up on his head and shoulders as that's where the snow would naturally fall and build up.

This is the finished painting, and the last detail that I added was a little bit of fog coming out of his nose and mouth, because I wanted to give the allusion of it being cold outside. I also added just a bit more snow to the picture to add the finishing touch.
That's it! the final painting is all done!
Happy painting! :)
Subscribe to:
Posts (Atom)